
If you're like me, you love photographs and have an acute appreciation for style. So when it comes to finding ways to display those photographs, you won't settle for just any off-the-shelf design disaster. Let's face it, many of the albums out there are downright ugly (who designs those things anyway!?!?)
And if you're a photographer who creates beautiful albums for your clients that cost hundreds of dollars, well you've developed a taste for the finer things in life... but it's just not feasible to fork out top dollar for every one of your own photo books. So here's what I propose: if you can draw a straight line and use double sided tape then, with a little bit of time and a lot of love, you can make your very own memory masterpiece.
What you'll need:
A Plain Paper Notebook
(I prefer Moleskine's 8.5” x 12” Acid Free Art Sketchbook)
A Ruler
An X-acto Knife
A Pencil
Double Sided Tape
Chocolate Chip Cookies - for sustenance :)
Chocolate Chip Cookies - for sustenance :)
and Photographs!!! (of course)
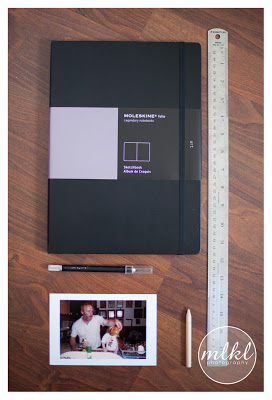 |
| Step 1 - Gather your supplies - many of which you may already have in your home. |
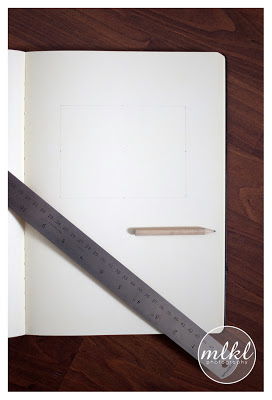 |
| Step 2 - Using a ruler, measure and draw a rectangle approximately 1/4 inch smaller than the width x height dimensions of your photograph. |
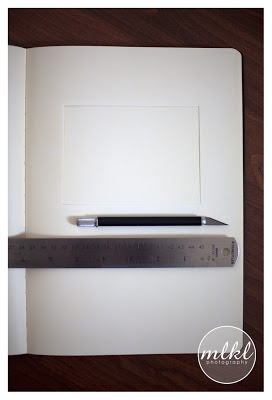 |
| Step 3 - Aligning your ruler with each drawn line, trace the rectangle with your X-acto knife. (Tip: by running the blade along the edge of the ruler, you will keep your cut smooth and straight) |
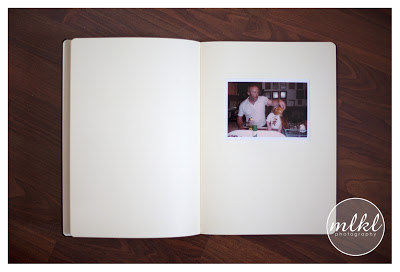 |
| Step 4 - Tape your photo behind the rectangle opening, and then, lining the double sided tape as close to the edge of the page as possible, adhere your photo page to the subsequent page - concealing the back of your photo - just like an album! |
That's all there is to it! Four simple steps to get you started creating your very own personalized, yet chic, photo album.
And if you're really bold... Customize as you go! Add some text to accompany your image or create a layout with multiple photographs on one page. Let this only be the launching point for your imagination to run wild!